
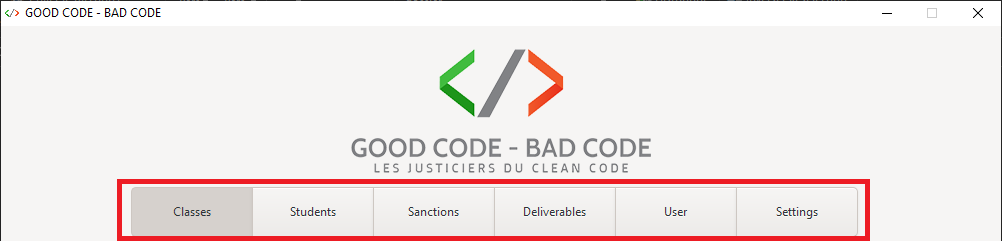
Bad Code


Description
This application was made for a professor in IT development. This one was tired of correcting badly written code so he decided to impose sanctions on those not respecting good programming practices.
This application is therefore used to manage several classes with different types of sanctions in order to manage all of this.
Features
Navigation
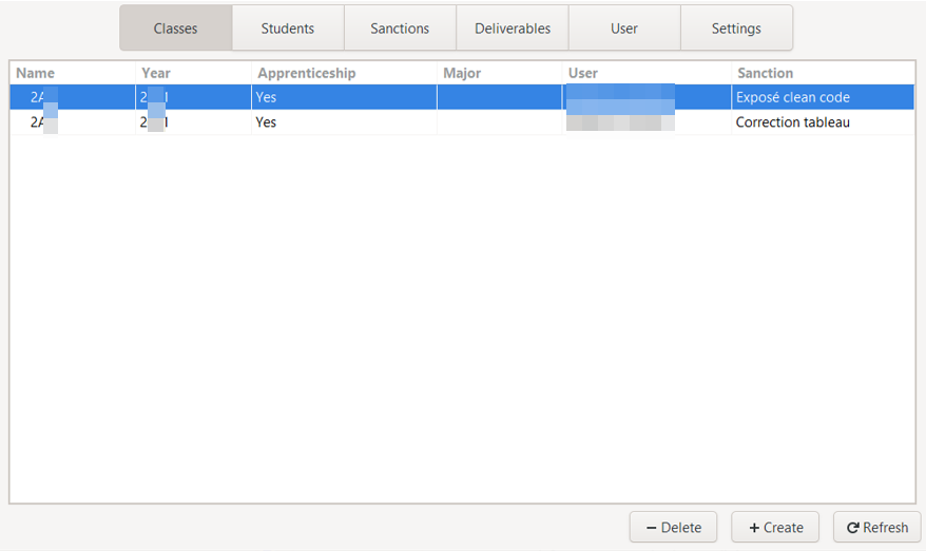
1. Classes management
• Name
• Year
• Apprenticeship or not
• Specialization
• User
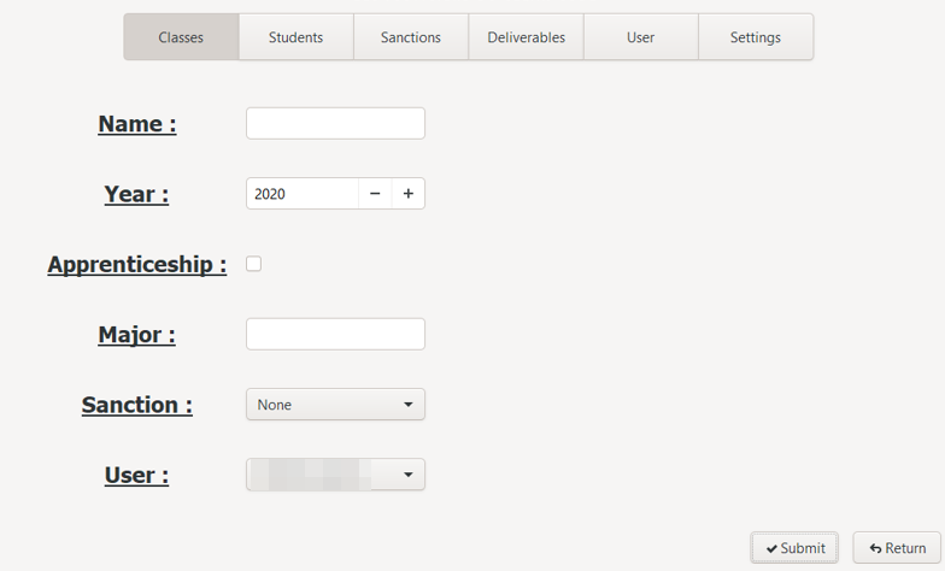
• Sanction affiliated to the class Displaying the creation view Switch between classes list view and class creation. Creation Form with 6 fields :
• Name: text field • Year: text field (4 digit)
• Rhythm: check box if apprentice class
• Specialization: text field
• Sanction: drop-down list
• User: drop-down list Back to the list from creation Two way to go back:
• Submit: add to the database
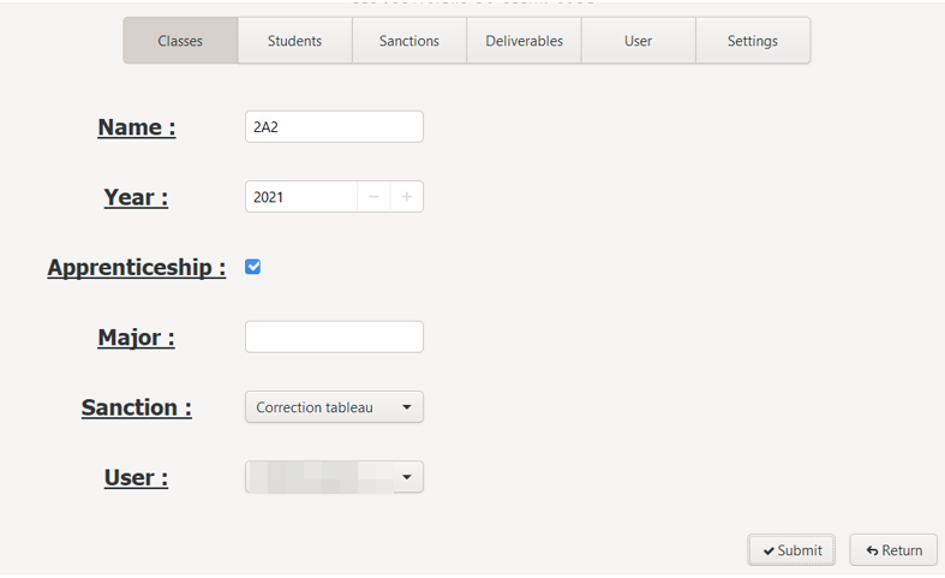
• Return: cancel the current process Displaying the edit view Switch between classes list view and class edition. Edition Pre-filled form with 6 fields:
• Name: text field
• Year: text field (4 digit)
• Rhythm: check box if apprentice class
• Specialization: text field
• Sanction: drop-down list
• User: drop-down list Back to the list from the edition Two way to go back:
• Submit: update in the database
• Return: cancel the current process Deletion Remove a class from database. Refreshing the list Refresh classes list.
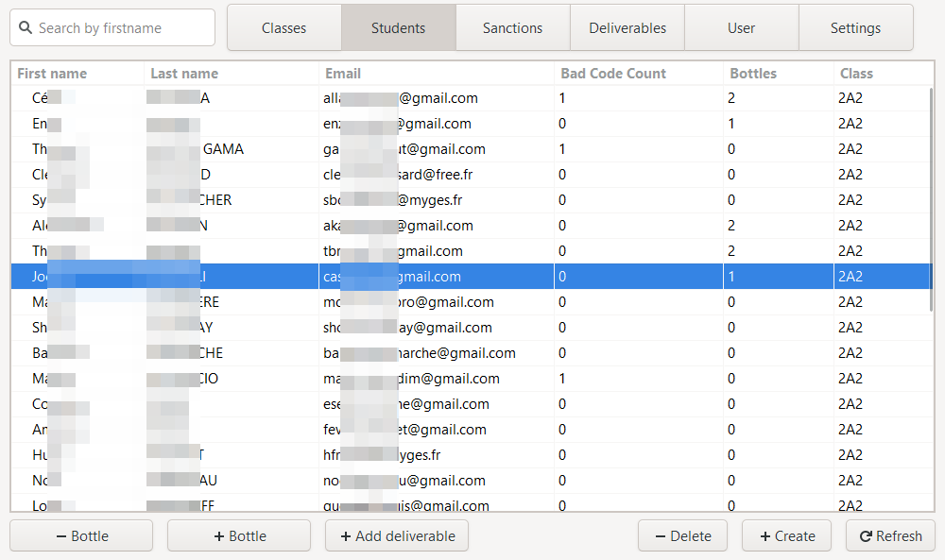
2. Students management
• First name
• Last name
• Total of "bad code"
• Total of champagne bottles :champagne:
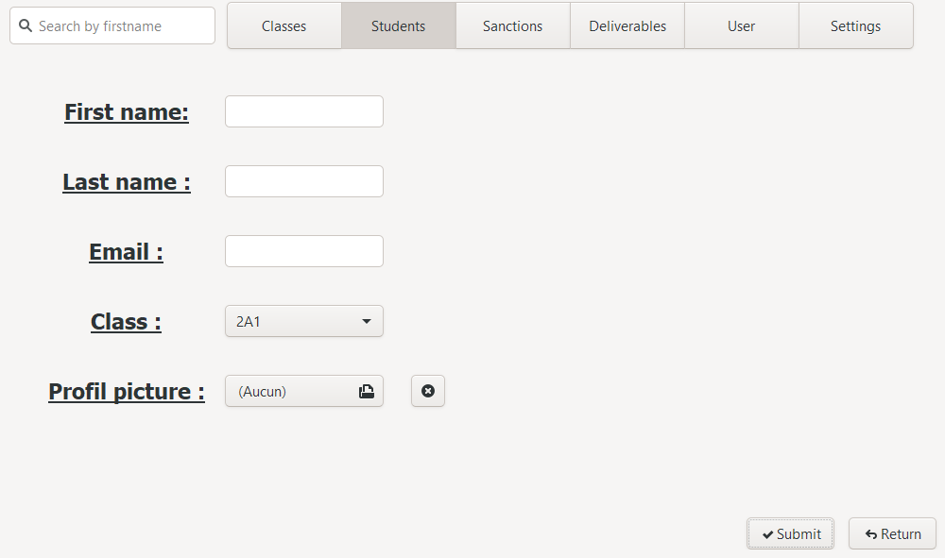
• Class Search bar Search on the first name in the list, select the first result corresponding to the search. Add a bottle :champagne: in total Add one bottle :champagne: to one student. Remove a bottle :champagne: in total Remove one bottle :champagne: to one student. Displaying the creation view Switch between students list view and student creation. Creation Form with 5 fields:
• First name: text field
• Last name: text field
• E-mail: text field
• Class: drop-down list
• Profile photo: file browser Back to the list from creation Two way to go back:
• Submit: add to the database
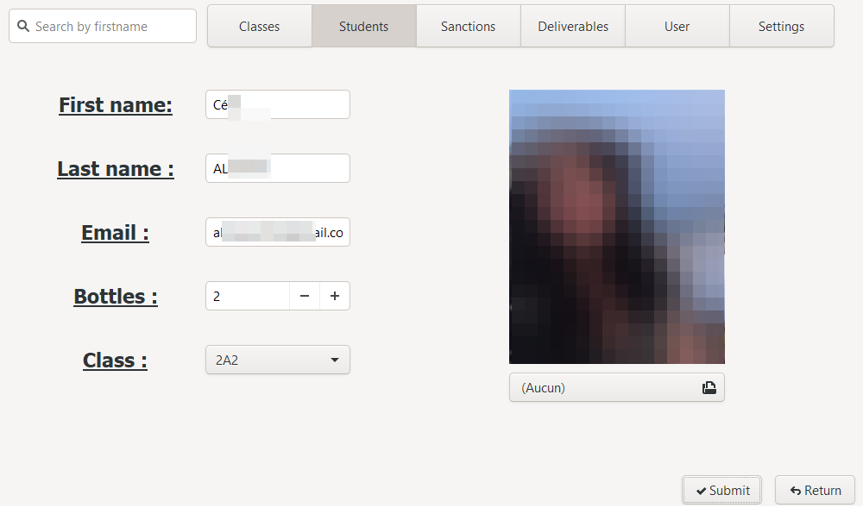
• Return: cancel the current process Displaying the edit view Switch between students list view and student edition. Edition Pre-filled form with 6 fields:
• First name: text field
• Last name: text field
• E-mail: test field
• Total bottles: text field
• Class: drop-down list
• Photo: image display + file browser Back to the list from the edition Two way to go back:
• Submit: update in the database
• Return: cancel the current process Deletion Remove a student from database. Add one deliverable Add new deliverable to a student. Refreshing the list Refresh students list.
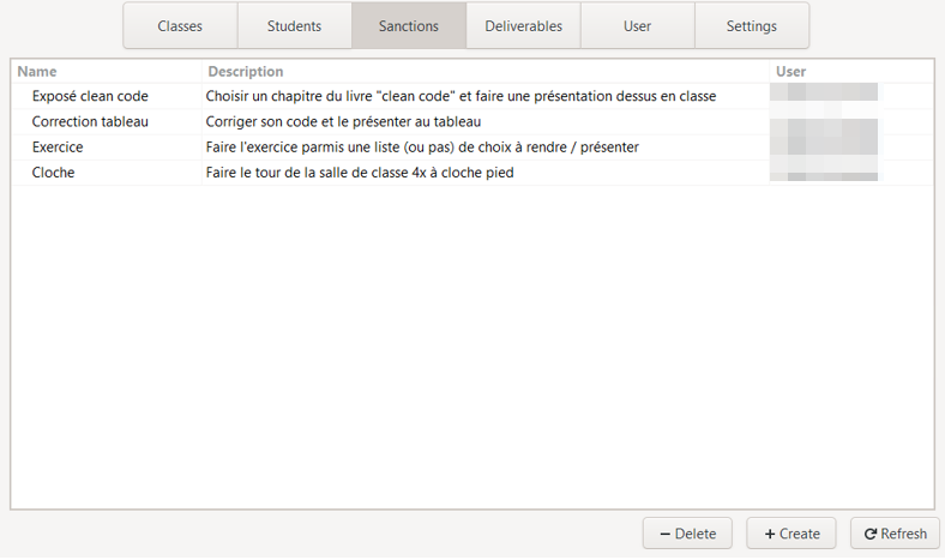
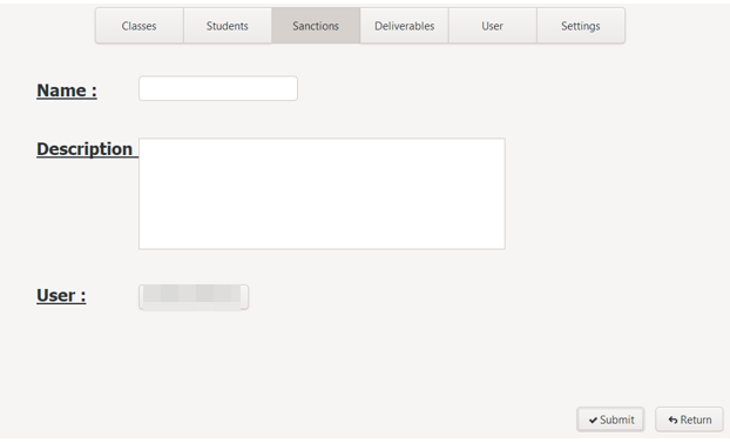
3. Sanctions management
• Name
• Description
• User Displaying the creation view Switch between sanctions list view and sanction creation. Creation Form with 3 fields:
• Name: text field
• Description: text field
• User: drop-down list Back to the list from creation Two way to go back:
• Submit: add to the database
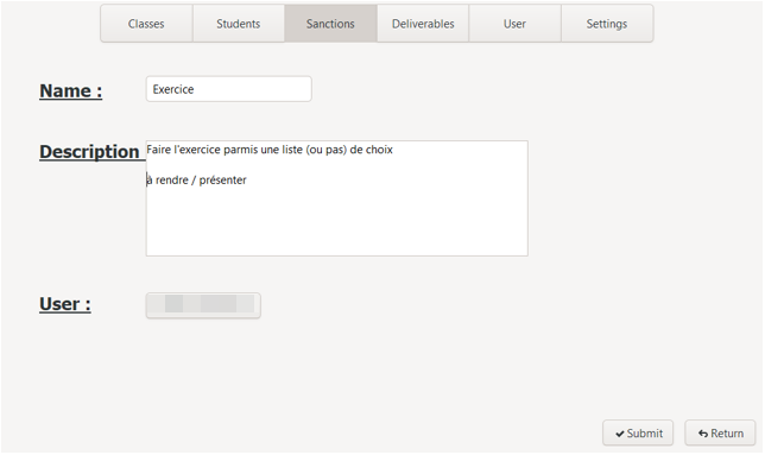
• Return: cancel the current process Displaying the edit view Switch between sanctions list view and sanction edition. Edition Pre-filled form with 3 fields:
• Name: text field
• Description: text field
• User: drop-down list Back to the list from the edition Two way to go back:
• Submit: update in the database
• Return: cancel the current process Deletion Remove a sanction from database. Refreshing the list Refresh sanctions list.
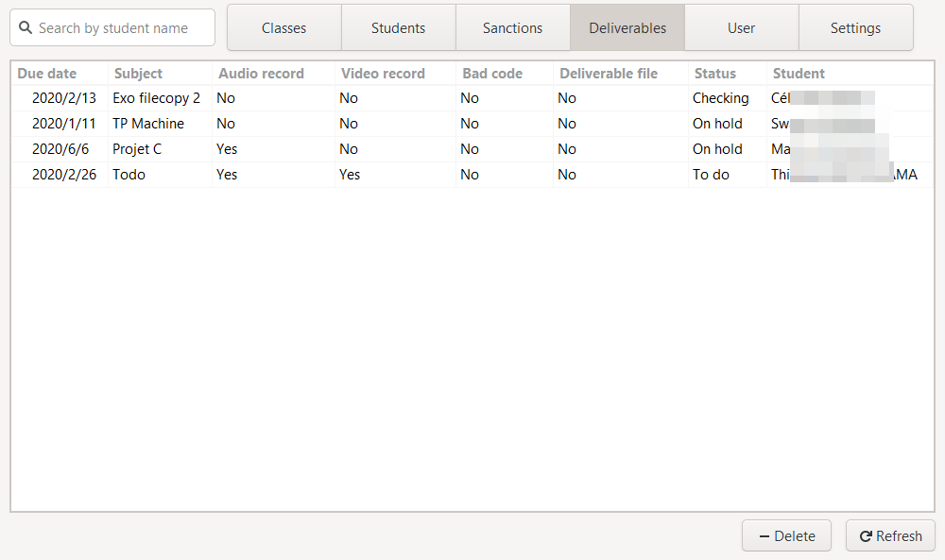
4. Deliverables management
• Due date
• Subject
• Audio recording (yes / no)
• Video recording (yes / no)
• Code file (yes / no)
• Other deliverable file (yes / no)
• Status
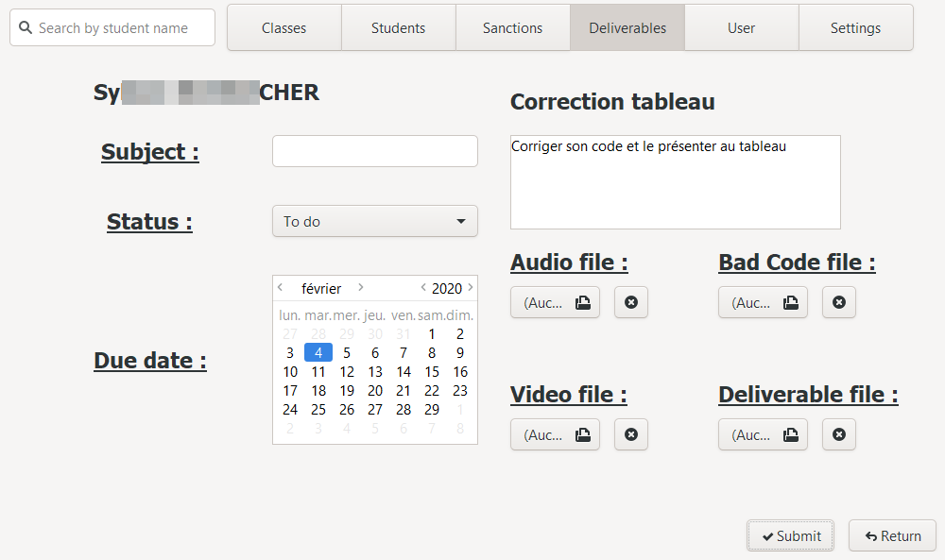
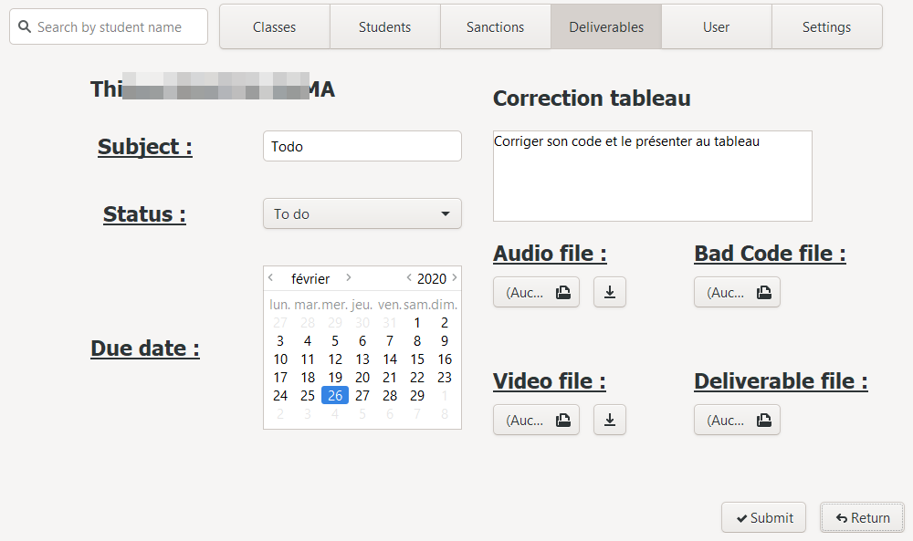
• Student Search bar Search on the name in the list, select the first result corresponding to the search. Displaying the creation view Switch between deliverables list view and deliverables creation. Creation Display of the student's name, the name of the sanction affiliated to his class and his description.
Form with 7 fields:
• Subject: text field
• Status: drop-down list
• Due date: calendar
• Audio recording: file browser
• Video recording: file browser
• Code file: file browser
• Other deliverable file: file browser Back to the list from creation Two way to go back:
• Submit: add to the database
• Return: cancel the current process Displaying the edit view Switch between sanctions list view and sanction edition. Edition Display of the student's name, the name of the sanction affiliated to his class and his description.
Pre-filled form with 7 fields:
• Subject: text field
• Status: drop-down list
• Due date: calendar
• Audio recording: file browser
• Video recording: file browser
• Code file: file browser
• Other deliverable file: file browser Back to the list from the edition Two way to go back:
• Submit: update in the database
• Return: cancel the current process Deletion Remove a sanction from database. Refreshing the list Refresh sanctions list. Download From edition, for each type of file, if a file is associated with the deliverable, a download button appears.
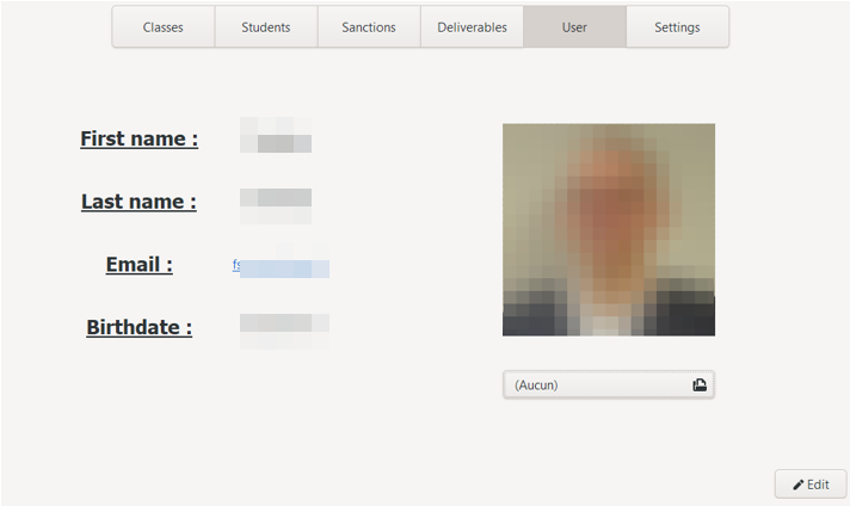
5. User interface
• First name: text field
• Last name: text field
• E-mail: text field
• Date of birth: label cannot be modified
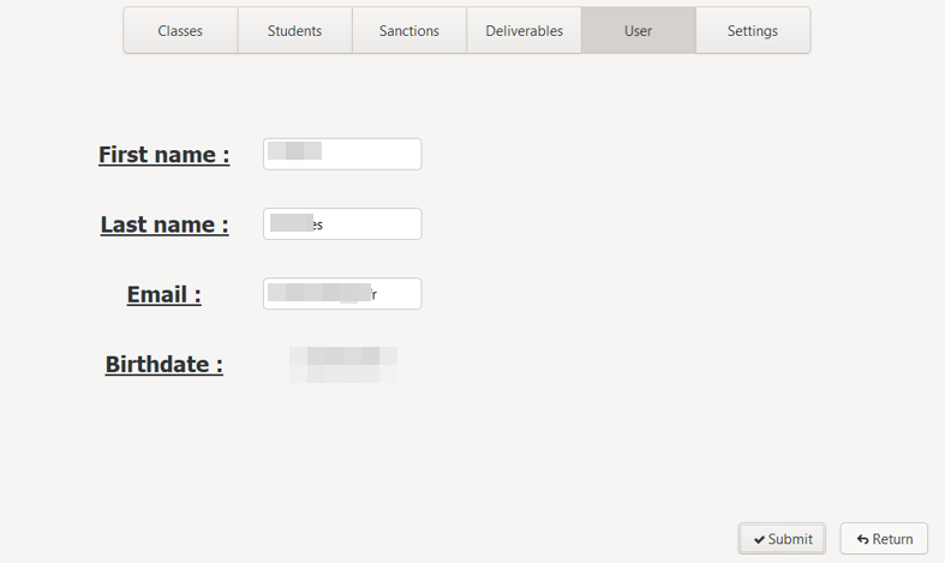
• Photo with file browser for instant modification Displaying the edit view Switch between user view and user edition. Edition Pre-filled form with 4 fields:
• First name: text field
• Last name: text field
• E-mail: text field
• Date of birth: label cannot be changed Back to information from the edition Two way to go back:
• Submit: update in the database
• Return: cancel the current process
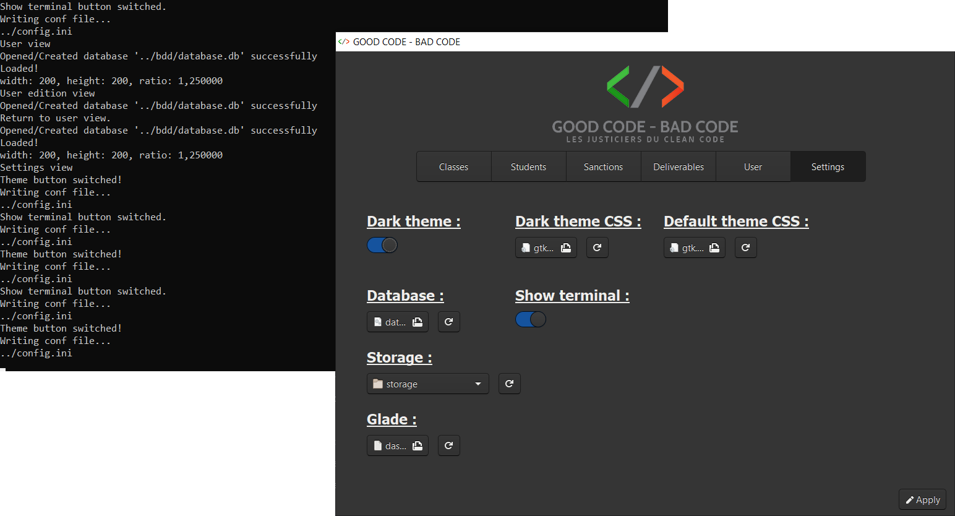
6. Settings
• Dark theme: switch button (instant update)
• CSS file of the dark theme: file browser
• CSS file of the default theme: file browser
• Database file: file browser
• Data backup folder: folder browser
• Glade file: file browser
• Terminal display: switch button (instant update) Update settings Apply changes in conf file.
Usage
1. Navigate between the sections
To access a specific section, click on the corresponding button on the menu bar, under the application logo.
2. Classes
a. Consult the classes list
The list of existing classes is the default view of the section. For each of the classes, we can see in the table:
By clicking on the name of a column, it is then possible to sort this list in alphabetical or reverse alphabetical order.
b. Create class
To create a class, click on the "Create" button at the bottom of the window. A form appears, allowing you to add the necessary information:
To submit creation, click on the "Submit" button at the bottom of the
page. To cancel, click on the "Return" button. In both cases, the list
of classes is then displayed.
In case of validation of the creation, the new class will be present in
the list.
c. Edit class
To update a class and access the edit interface, two solutions are
possible: double-click on the desired line, or select it the first time
with a single click, then press the Enter key.
The edit interface is displayed: it is very similar to the creation
interface, except that the fields are pre-filled with the current
information of the selected class.
d. Delete class
To delete a class, you must first select it, then click the "Delete" button at the bottom of the window.
e. Refresh classes list
To refresh the classes list, click on the "Refresh" button at the bottom of the window.
3. Students
a. Consult the students list
The list of existing students is the default view of the section. For each student, we can see in the table:
By clicking on the name of a column, it is then possible to sort this
list in alphabetical or reverse alphabetical order.
A search bar is also available on the left of the menu, allowing you to
perform a search on first names: the first line corresponding to the
search is then selected.
b. Create student
To create a student, click on the "Create" button at the bottom of the window. A form appears, allowing you to add the necessary information:
The profile photo can be added from this interface using the file
browser: a copy of the original photo will then be saved in a specific
folder in the application. Once the file selected, it is then possible
to click on the button with a cross allowing to cancel the choice. If no
profile photo is selected, a default image will be assigned.
To submit creation, click on the "Submit" button at the bottom of the
page. To cancel, click on the "Return" button. In both cases, the list
of students is then displayed: in case of submmit of the creation, the
new student will be present in the list.
c. Edit student
To update a student and access the edit interface, two solutions are
possible: double click on the desired line, or select it the first time
with a single click, then press the Enter key.
The edit interface is then displayed: this is similar to the creation
interface, with the difference that the fields are pre-filled with the
current information of the selected student, the resized photo of the
student is displayed.
A text field allows manual modification of the number of champagne
bottles :champagne:. It is also possible to change this number directly
via the student list: to do this, select the appropriate line then click
on the "+ Bottle":champagne: or "- Bottle":champagne: buttons (the
number of bottles :champagne: cannot be negative).
d. Delete student
To delete a student, you must first select their line, then click on the
"Delete" button at the bottom of the window.
All the files and folders associated with this student (photos,
deliverables, etc.) are then deleted.
e. Refresh students list
To refresh the students list , click on the "Refresh" button at the bottom of the window.
4. Sanction
a. Consult the sanctions list
The list of existing sanctions is the default display of the section. For each of the sanctions, we can see in the table:
By clicking on the name of a column, it is then possible to sort this list in alphabetical or reverse alphabetical order.
b. Create sanction
To create a sanction, click on the "Create" button at the bottom of the window. A form appears, allowing you to add the necessary information:
c. Edit sanction
To update a sanction and access the edit interface, two solutions are
possible: double-click on the desired line, or select it the first time
with a single click, then press the Enter key.
The edit interface is then displayed: it is in all respects similar to
the creation interface, with the difference that the fields are
pre-filled with the current information for the selected sanction.
d. Delete sanction
To delete a sanction, you must first select its line, then click on the "Delete" button at the bottom of the window.
e. Refresh sanctions list
To refresh the sanctions list , click on the "Refresh" button at the bottom of the window.
5. Deliverables
a. Consult the deliverables list
The list of existing deliverables is the default view of the section. For each of the deliverables, we can see in the table:
By clicking on the name of a column, it is then possible to sort this
list in alphabetical or reverse alphabetical order.
A search bar is also available on the left of the menu, allowing you to
perform a search on the names of the students. The first line
corresponding to the search is then selected.
b. Create deliverable
To create a deliverable, you must first be on the list of students,
select the line of the student concerned then click on the "Add
deliverable" button.
A form appears, it recalls the non-modifiable information (the name of
the student, the name of the sanction associated with his class and the
description of it) and allows you to add the necessary information:
Once a file is selected, it is then possible to click on the button with
a cross allowing to cancel the choice. Otherwise, a copy of the original
files will then be saved in a folder specific to the application.
To submit creation, click on the "Submit" button at the bottom of the
page. To cancel, click on the "Return" button. In both cases, the list
of deliverables is then displayed.
In case of validation of the creation, the new deliverable will be
present in the list.
c. Edit deliverable
To update a deliverable and access the edit interface, two solutions are
possible: double-click on the desired line, or select it the first time
with a single click, then press the Enter key. The edit interface is
then displayed.
It is in all respects similar to the creation interface, with the
difference that the fields are pre-filled with the current information
for the selected sanction.
In addition, if a file is already associated with the deliverable, it is
then possible to download a copy at the location chosen by the user via
the download interface.
d. Delete deliverable
To delete a deliverable, you must first select its line, then click on the "Delete" button at the bottom of the window.
e. Refresh deliverable list
To refresh the deliverables list , click on the "Refresh" button at the bottom of the window.
6. User
a. View user's information
User's information is the default view of the topic and consists of five fields:
His profil picture can be modified directly from this interface: only image formats are accepted. If a photo is added, a copy of the original photo will then be saved in a folder specific to the application, and the new image will be directly displayed at the correct size.
b. Update user
To access the user edit interface, click on the "Edit" button: the edit
interface is displayed, allowing you to modify the three required
information (first name, last name and e-mail) .
The date of birth is obviously not changeable :nerd_face: :champagne:
:100:
7. Settings
a. Consult current settings
The settings section displays the global variables of the application, located in the configuration file:
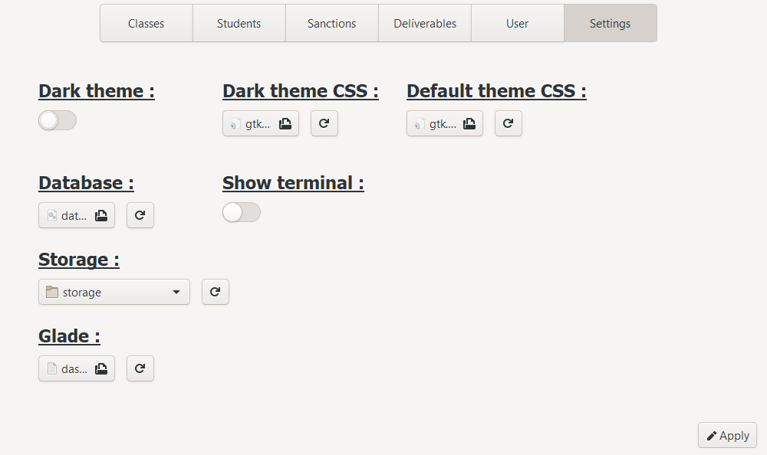
b. Update settings
The update of the settings values is done directly from the display page with:
A "switch" button: to apply or not the dark theme and to display or not the console A folder browser: for the backup folder of the application data File browser: for other filesWhen a file or folder is selected, it is possible to cancel this selection and return to the initial value (the one present in the configuration file) using the "Reset" button located next to each file selector. To submit the new values and write them on the configuration file (saving them for the next opening of the application), click on the "Apply" button. In fact, if the switch buttons directly display the result of their value (allowing dynamic juggling between themes), the others will only be saved by clicking on the "Apply" button.
Installation
Using setup file
You can install this application with the setup file located here : installation/bad_code_setup.exe
Cmake compilation
Or compile it with the CMakeLists.txt
Warning :warning: :warning: :warning: !!!
In both case, you will need to have mingw installed with gtk+3.20 at
least.
I didn't figured out yet how to compile it in static in all-in-one
executable file...
Using msys2 :
Here's the command to execute inside msys2 to be able to compile this project :
pacman -Syu
pacman -S mingw-w64-x86_64-gcc
pacman -S mingw-w64-x86_64-gtk3
Then, you need to link the msys2/mingw64/bin folder to your system environment variable PATH
During the build, if some libraries are not found, go to the folder
msys2/mingw64/include and copy them outside of there version
folder:
Exemple : copy gtk and gdk folder inside
msys2/mingw64/include/gtk-3-0/ directly inside
msys2/mingw64/include/
Contributing
If someone has the idea and know how to compile in static with GTK and stuffs to be dependence free on windows OS, be my guest !
Authors
This project was carried out in a group of two people, myself included.
 Noé LARRIEU-LACOSTE

More Documentation
Here's some stuff I looked at when I was developing this application :
Header files
https://www.tutorialspoint.com/cprogramming/c_header_files.htm
Guides
https://gerald3d.developpez.com/tutoriels/gtk/glade3/
https://openclassrooms.com/fr/courses/1343806-pygtk/1343942-glade
https://www.guillaumeriviere.name/estia/DRI/tp1.php
ThreeView
https://linuxfr.org/users/trim/journaux/utilisation-de-gtktreemodel-gtktreeview-et-consorts https://gtk.developpez.com/cours/gtk2/?page=page_23